Your Cart is Empty
FREE SHIPPING FOR U.S. ORDERS OVER $100

At least once a week, I get asked what my best tips are for a beginner embroiderer. I feel like this is a subject that I could go on and on about. And as much I as would love to meet with everyone in person and "talk shop", I know that is just not feasible. So consider this post as my letter from one embroidery enthusiast to another. Here are my top embroidery tips:
1. Stop pulling your stitches so tight.
So when you pull your stitches too tight, you are creating 2 potential problems. One, you risk rippling or puckering the fabric. Two, depending on what you are creating, you risk making your stitches look really strange and uneven. So here's a visual for you. Everyone has seen someone with a ponytail or bun in their hair. There is the normal ponytail that is pulled up and neat. Then there is the ponytail or bun that is so severely pulled up and too tight that it gives you headache just looking at it because it looks like each hair is about to pop. Apply that same scenario to your stitches. You get my point?
2. The fabric you use makes ALL the difference.
So I feel like this is a big one for those just starting out. For beginners, I prefer them to start with a high-quality, non-stretchy, non-see-thru cotton (like Kona Cotton). I like this fabric for beginners because it has a tight even-weave fabric that is not too tough on the hands and it allows your stitches look more consistent. Plus it is readily available at any fabric store and comes in a bunch of different colors. To get started, take a look at these specific fabrics: cottonvill, cotton muslin, and Kona cotton.
Now as you gain experience, absolutely try other fabrics. My go-to is always linen, but I know other embroidery artists that hate linen. I have also seen others use denim or thick canvas for their embroidery projects... but denim makes me say curse words because my stitches are usually so tiny and detailed that it makes my hands hurt. The moral of this story... find the fabric that works best for you and don't be afraid to experiment.
Here are few places that I get my fabric at:

3. Overlap your stitches.
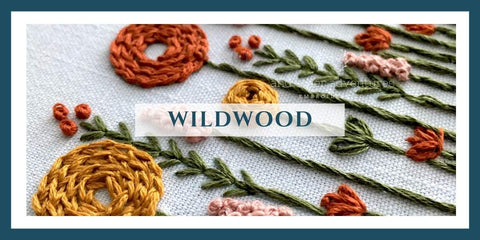
So this suggestion really depends on what you are trying to stitch. But if you are like me and tend to love highly detailed, textured stitching, then this tip is just for you. If you take the example of my bouquet designs, I overlap everywhere... because that is what a real bouquet would look like. Plus it makes the finished project look full and lush.
4. Try out different floss strand counts
So here is what I mean by this... I am able to create all different types of flowers with the same exact stitch. By adjusting the numbers of threads that I use, I can create a different look for each one. For example, if you want to create a dainty, delicate flower, use 1-3 threads. On the flip side, if you want to create a lush flower with lots of body, I use 4-6 threads. And on really large projects, I sometimes combine 2 flosses with a total of 12 strands. Though I will warn you that 12 combined strands of floss is really hard on the fingers and hands. So play around with the number of floss threads you use and notice the differences in the same type of stitch.

5. Play around with colors (my personal favorite)
When I feel like I am stuck and in a rut with my stitching, I always go play with my floss colors. I keep all of my floss on clothespins that are all sorted by color in an old wooden soda crate. I will sometimes dump that whole thing out on my floor and just put different color combinations into piles to see what sparks inspiration.
But I also understand those ruts where you just can't seem to get the colors to work the way you want. Those moments happen to me too. So it is on that note that I created Floss Color Palettes. These are color combination guides that will help you choose the perfect colorway for your stitching project. With over 20 different color combinations to choose from, the hardest part is choosing just one.


6. Remember this stitching hobby is supposed to be fun and bring you joy while you learn something new.
I say this all the love... You are going to mess up over and over again. Your finished project may not look exactly the way that you want it to. All of that is okay. I still mess up all the time. It is all part of the process to learn this time-honored tradition of hand embroidery. Just keep stitching.

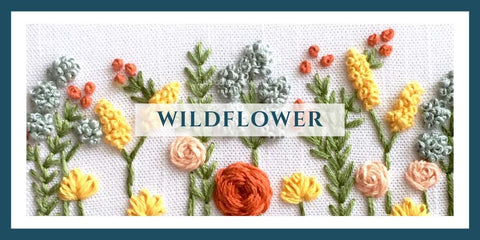
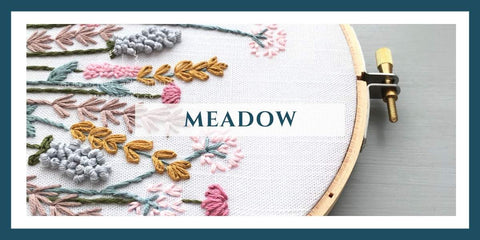
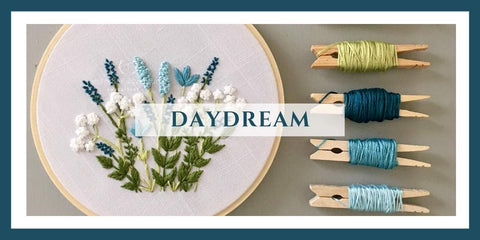
7. If this is your first attempt at embroidery, I highly recommend starting with a full embroidery kit.
Embroidery is like any other new thing that you have tried in that it is always better to do it with a friend who can show you the ropes. And in this case, that friend could be me - an experienced embroidery artist that knows all the supplies you need, has designed a pattern that is perfect for beginners, that provides you a foundation of embroidery knowledge, and walks you through each step that you need to create the final product. Plus, that friend is just one email away should you run into any questions. So if this is your first go at embroidery, I think an embroidery kit is the way to go. I am listing a few of my most popular beginner kit collections below - these are time-tested designs that I always recommend first to someone just starting out. Plus there are a LOT of colors to choose from with each design. You can also see the full list of beginner embroidery kits HERE.
Click on the image below to take you to that collection:
The following post contains affiliate links and I may make a small commission if you make a purchase using my links below. Again, thank you for supporting And Other Adventures Embroidery Co!
Comments will be approved before showing up.