
Your Cart is Empty
FREE SHIPPING FOR U.S. ORDERS OVER $100
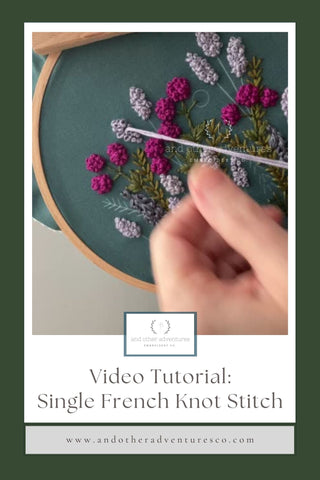
I LOVE French Knots! In my opinion, this stitch is a must-have in your stitching arsenal. They add texture and are very versatile in how you can use them. Scroll down to see the video.
1. Bring your needle up through the fabric where you want your knot to be.
2. Wrap your floss around the needle 1 time... That is what makes it a "single" french knot vs a double French knot where you wrap the needle twice.
3. While holding the needle in your predominant hand (for me it's my right hand), be sure to hold the floss coming off the wrapped needle in your other hand (my left). Then place the tip of the needle down right next to where your needle originally came up. Slowly pull that needle through the fabric.
And there you have it. You have 1 completed Single French Knot.
NOTES:
To read through all the other stitches in my library, click HERE. And to see my entire Resource Library full of all sorts of tips and tricks, click HERE.
Comments will be approved before showing up.