Your Cart is Empty
FREE SHIPPING FOR U.S. ORDERS OVER $100

Another fun stitch that I use fairly regularly is what I like to call the circular stem stitch, also known as the rosette rose stitch or the spiral stem stitch. Keep in mind that everyone has different names for different things when it comes to stitching. But for the purpose of this tutorial and my patterns that use this stitch, I am letting you what I call them so that it is easy to reference.
Okay, so back to spiral stem stitch.

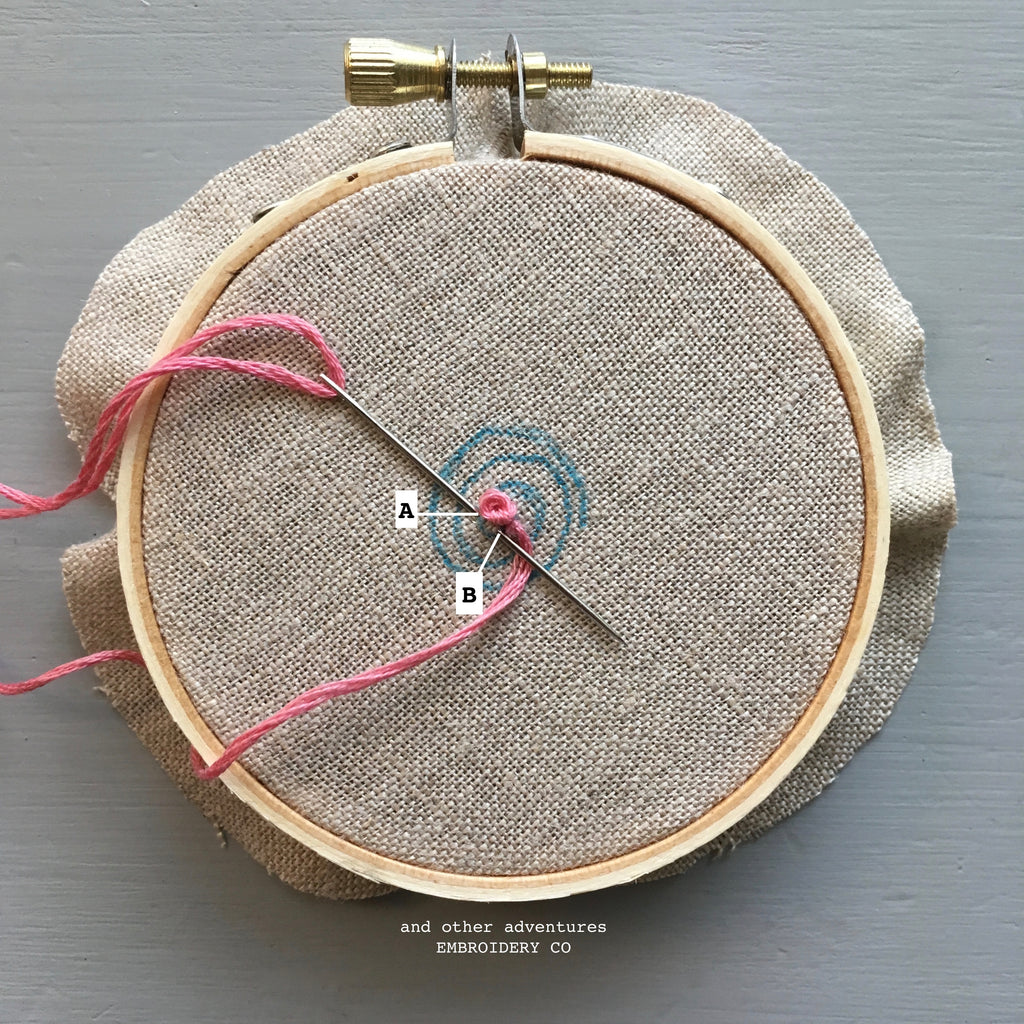
1. As you can see in the photo above, I have drawn a spiral on to my fabric. I don't normally draw this on my own stitching, but I find this spiral visual to be helpful here in showing you the direction that the stitches will go. So for your first try with this stitch, you can draw it to help guide you, but once you are comfortable it is completely unnecessary to draw it.

2. From the bottom bring your needle up through the center of the spiral.

3. There are lots of different methods to create the center of this stitch, but my usual go-to is a simple french knot with 2 wraps of the floss around the needle.

4. Once your french knot is in place, bring your needle up from the bottom right next to that french knot.

5. In this first layer of the flower, you are basically going to do stem stitch working around the perimeter of the french knot. In order words, bring your needle down at A and bring it back up at B. Notice that the thread is tucked under the needle.


6. Continue working this A to B pattern slowly around the spiral.

7. Viola! Here is what your completed spiral stem stitch flower will look like.
HINTS:
To read through all the other stitches in my library, click HERE.
This is brilliant!! I have never heard of this stitch before :)
This is the best tutorial on this stitch and I’ve read and watched tons! Tried your method and got it on my first try. Not perfect but 100% better than other attempts. Drawing the spiral really helps. Thank you!!
Comments will be approved before showing up.
Gaynor Button
September 15, 2021
What a wonderful visual tutorial – many thanks 😊